
With Windows 10 now into its latest edition, the 1607 “Anniversary” update, it now appears, for better or worse, to be here to stay. It has generated a lot of interest; supposedly the “last version of Windows”, many expected it to be akin to Windows 7 – an improvement following a much-maligned previous Windows version. However, the reality has turned out to be somewhat different from what many were expecting.
Microsoft are now “cloud first, mobile first”, and a lot of this new strategy shows through – sometimes somewhat cynically – in Windows 10. For my sins, I’ve been involved in a Windows 10 deployment since August of 2015, so now, just over a year in, it is maybe time to share the things I’ve learned in the hope that it may give some of you a bit of help when it comes to deploying (or not deploying!) this new version of Microsoft’s flagship operating system.
This set of articles is going to expand at the rate of one a day over the next week or so, and cover a wide range of issues for those of you deploying Windows 10 – whether it be fully virtualized via Citrix XenDesktop or the like, or simply a general physical deployment. Hopefully, it will be everything you need to know!
Don’t forget to read the first parts of this series too – EDITIONS, SERVICING BRANCHES, MODERN APPS, TELEMETRY, THE START MENU and ROAMING.
PROFILES
Kind of following on from the ROAMING section, we’re going to have a quick discussion about profiles in Windows 10. It is interesting to note how profile sizes have changed in the most recent versions of Windows – here’s some data showing the average size of a user profile at first logon
Windows 7 – 20MB
Windows 8.1 – 61MB
Windows 10 – 122MB
A sixfold increase in profile size from Windows 7 to Windows 10 – quite impressive!
Now historically, most of us have mitigated against the issues caused by default profile sizes by using various methods to both reduce this size and increase the performance of the system. Using different profile types has often been a key part of this. Some discussion about the different profile types is below.
Mandatory and super-mandatory
There’s not much difference between these two – a mandatory profile is defined on the user object or by GPO, and loads a specific locked-down profile (pre-created by an administrator) which is discarded from the endpoint at logoff. Super-mandatory is exactly the same, except the user can’t log on if the mandatory profile is unavailable.
These options have long been used in XenApp and XenDesktop environments, and also in high-volume non-persistent enterprises. Unfortunately, on Windows 10 (currently) both mandatory and super-mandatory profiles don’t work. Because of the Start Tiles database, a mandatory profile ends up with user information hard-coded and therefore the OS detects the database as corrupted, and the Start Menu doesn’t function. We’re told by Microsoft they have this logged as a bug and are going to fix it eventually, but no timescale is available as of yet and it seems to be a low priority for them.
Update – mandatory profiles now work, if you use Audit Mode to create them, see this video for a demonstration of how to do it!
Roaming
Roaming profiles allow the user’s profile to be saved out to the network at logoff and restored at next logon, effectively moving the saved profile from device to device. As we already covered in the ROAMING article, though, on Windows 10 these profiles a) don’t currently work, and b) can’t save the Start Tiles database anyway, because it is stored in %LOCALAPPDATA%.
Local
Local profiles are exactly that – a copy stored local to the device. They don’t roam from machine to machine and are simply stored wherever the user logged in. Microsoft recommend that everyone on Windows 10 use local profiles, but that doesn’t lend itself to roaming or non-persistent environments, it doesn’t protect the user’s data and configuration in the event of primary device failure, and it assumes that each user has a dedicated device. Also, if you’re in an environment where multiple users utilize different machines (such as public access areas), you may find hard disk space filling up with hundreds or even thousands of copies of local user profiles.
Currently on Windows 10 there isn’t a real way to utilize anything but local profiles without hitting some issues. So if you’re have a roaming requirement or non-persistent solution, you need to leverage some form of UEM tool to achieve this with local profiles. If you’re in a dedicated “one device per person” environment, then this is all well and good – but you’re still going to hit problems when it comes to failed devices or migrating settings before feature upgrades land.
Removing cached copies of local profiles
If you want to remove cached copies of local profiles in multi-user environments to stop disk space filling up, you have a few options:-
1. Add all your users to the Guests group – this works and the profiles are discarded at logoff, but strangely, being a Guest on Windows 10 means that certain Start Menu functions are missing, so I wouldn’t recommend using this method.
2. Spoof a mandatory profile – you can do this by setting up a logon script to run the following PowerShell (lines will wrap)
$USERSID = ([Security.Principal.WindowsIdentity]::GetCurrent()).User.Value
$regpath = “HKLM:\Software\Microsoft\Windows NT\CurrentVersion\ProfileList\$USERSID”
$name = “State”
Set-ItemProperty -Path $regpath -Name $name -Value “5”
This will mark the profile as mandatory just after login, avoiding the issues with mandatory profiles because it actually loads a local profile, but forcing the OS to discard the profile at logoff. This actually works quite well, especially as you can use a security filter to apply this to only specific groups of users.
3. Configure the GPO to delete profile copies over a certain number of days – this is found at Computer Config | Admin Templates | System | User Profiles | Delete user profiles older than a specified number of days at system restart. The minimum value is 1, so on restart any profiles over a day old will be removed. This works fairly well as long as you restart regularly – it can be a little problematic if the user has got multiple profile copies on the device, or if there are specific accounts (such as service accounts) that you don’t want to be removed.
4. Use a tool like delprof2.exe to delete unused user profiles – you can run this at many different times, but my favourite is simply using a Scheduled Task that runs once a day and clears out any other user profiles. You can set filters to allow specific accounts (such as admin or service accounts) to be ignored, and many other parameters which are detailed in the link above. I find this method to be excellent if you need to filter down the scope of your deletion rather than removing all user profiles.
Out of these methods, I’d recommend either 2, 3 or 4, dependent on the environment. 2 or 4 are most suitable if you need control of which users you apply this to – 3 is a bit of a sledgehammer approach.
Custom default user profile
One of the best performance enhancements I’ve done in Windows 10 is to create a custom default user profile by using Audit Mode. However, because it is Windows 10, you actually need to sanitize your custom default user profile after creation, because otherwise you may encounter issues with the Start Menu due to that pesky database! If done properly, it will allow you to significantly reduce the logon time of first users, especially when combined with the removal of all unneeded Modern Apps.
Here is the process for creating it that I follow – feel free to adapt this as necessary to your environment.
Launch Windows 10 build until it reaches the following point
Press Ctrl-Shift-F3 to trigger Audit Mode
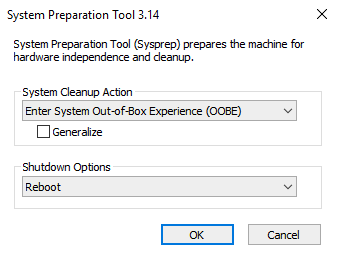
This will log you in as a local administrator and allow you to customize the user profile, then save it out to the image. Firstly, click on Cancel at the sysprep dialog
Create an XML file with the following text:-<?xml version=”1.0″ encoding=”utf-8″?><unattend xmlns=”urn:schemas-microsoft-com:unattend”>
<settings pass=”specialize”>
<component name=”Microsoft-Windows-Shell-Setup” processorArchitecture=”amd64″ publicKeyToken=”31bf3856ad364e35″ language=”neutral” versionScope=”nonSxS” xmlns:wcm=”http://schemas.microsoft.com/WMIConfig/2002/State” xmlns:xsi=”http://www.w3.org/2001/XMLSchema-instance”>
<CopyProfile>true</CopyProfile>
</component>
</settings>
<cpi:offlineImage cpi:source=”wim:D:/sources/install.wim#Windows 10 Enterprise” xmlns:cpi=”urn:schemas-microsoft-com:cpi” />
</unattend>
Changing the settings in bold to those as required in your environment (the path to the install files, and the Windows 10 Edition)
Make a note of the XML file name and path – I normally copy it to C:\unattend.xml
Customize the user profile as much as you need. I normally choose this time to remove all Modern Apps I don’t want (see my previous article on this), set the default view to show file extensions, set the browser home page, remove unneeded startup items, and hide the Quick Access in File Explorer. Do as much or as little as you need to.
When you are finished, open an administrative command prompt and run the following command
%windir%\system32\sysprep\sysprep.exe /generalize /oobe /reboot /unattend:c:\unattend.xml
where c:\unattend.xml is the path to the XML file you created.
Now, this will restart the system and complete the installation, copying your user profile into the default user profile area.
However, because this is Windows 10, you need to sanitize this default profile, otherwise you may end up with a broken Start Menu. When the machine restarts, it will log you on with a local account, and you can then browse into the default profile and remove the parts that aren’t needed. This process is very similar to the creation of a mandatory profile, with one big difference – you don’t rename it to a .man file extension at the end.
Normally, I do the following:-
- Open C:\Users\Default and show Hidden files and Protected files (DO NOT FORGET TO PERFORM THIS STEP!)
- Delete C:\Users\Default\AppData\LocalLow
- Delete C:\Users\Default\OneDrive
- Remove everything from C:\Users\Default\AppData\Local EXCEPT the following folders:-
- \Microsoft\Windows\Shell (you need this folder for Start Tiles)
- \Microsoft\Windows\WinX (you need this folder for the right-click Start Menu)
- Remove everything from C:\Users\Default\AppData\Roaming EXCEPT the following folder:-
- \Microsoft\Windows\Start Menu\Programs (you need this for the All Apps Start Menu)
- Open the Registry hive from C:\Users\Default\ntuser.dat in regedit.exe
- Check the Registry permissions allow all users Read permissions at least
- Search for and remove all references to the base username (normally Administrator)
- Remove the following Registry keys from the loaded hive (if they exist):-
- \EUDC
- \GameConfigStore
- \Appxbackup
- SOFTWARE\RegisteredApplications
- SOFTWARE\Policies
- SOFTWARE\AppDataLow
- SOFTWARE\Microsoft\Fax
- SOFTWARE\Microsoft\GameBar*
- SOFTWARE\Microsoft\OneDrive
- SOFTWARE\Microsoft\SkyDrive
- SOFTWARE\Microsoft\F12
- SOFTWARE\Microsoft\UserData
- SOFTWARE\Microsoft\UE-V
- SOFTWARE\Microsoft\Windows\CurrentVersion\ApplicationToasts
- Unload the loaded hive (DO NOT FORGET TO PERFORM THIS STEP!)
- Remove temporary Registry files (.regtrans-ms and .blf extensions in the user root folder)
Once all of these sanitization steps are done, the C:\Users\Default folder will be ready for deployment or use. You can copy this folder directly into different images of the same OS level and it should function in the same ways, allowing a smoother first logon and the deployment of many default settings.
SUMMARY
Profiles are a bit of a pain in the Windows 10 world – mainly because mandatory, super-mandatory and roaming profiles are either currently broken or missing required functionality. Summing up how to deal with profiles in Windows 10 is therefore pretty simple:-
- Use local profiles, combined with a roaming technology if necessary to accommodate roaming requirements, recovery from device failure or OS upgrades
- If you need to remove cached profile copies, use delprof2.exe or a spoofed profile so you can filter this to your needs
- Always try to create and sanitize a custom default user profile, it takes time but will afford better performance at first logon
- Use this method if you need to create a mandatory profile – https://www.youtube.com/watch?v=2J7AWMxA__8
Stay tuned for the next part of this series, hopefully towards the end of the week, where we will talk OPTIMIZATION.

