
I ran into an interesting problem today. A client had upgraded their AppSense infrastructure from 8.0 to the latest version. Most of the endpoints checked in OK, but several Windows 2003 servers running XenApp 5.0 had failed to install the latest agents for Performance Manager and Application Manager. The error given was “1603 – fatal error during installation”.
In the Management Console the errant servers showed up like this:-
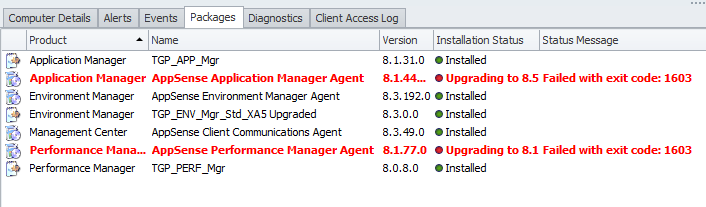 |
| The errors on the XenApp 5 servers |
Error number 1603, as I remember, I had seen on a couple of occasions in the AppSense knowledge base regarding errors with installation or uninstallation of agents. Further investigation revealed that these errors were happening during uninstallation – the removal of both the Performance Manager and Application Manager agents was failing.
The two relevant points about this on the AppSense Knowledge Base related to a failure in the certificate chain (article TN-150761) and another when the .NET Framework was not correctly installed (article TN-150606). However, using these articles I soon verified that the certificate was valid and the .NET Framework was indeed correctly installed. After a bit more troubleshooting, it appeared that the only way to get these endpoints back into a working state would be to do a manual uninstallation of all of the AppSense software.
Manual removal is an annoying and long-winded process for any software, but sometimes it has to be done. The process for doing this on Citrix XenApp is documented here – http://support.citrix.com/article/CTX746354 – in the section titled “Manually Uninstalling Citrix Presentation Server when Add/Remove Programs and Command Line Fail”. For Microsoft Office, it is documented here – http://support.microsoft.com/kb/290301 – in the section titled “Method 4: Remove Microsoft Office 2010 suites manually”. For AppSense, however, we don’t have a documented process, so we will have to do it best we can using our knowledge of the product suite and other manual uninstall methods.
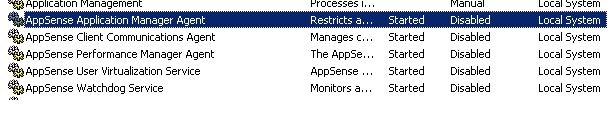
Firstly we will need to set all the currently running AppSense services to disabled – assuming, naturally, that we have already removed the users and active sessions from the server or endpoint! Run services.msc and disable all the AppSense services as shown in the screenshot below
Next, restart the system so that all of the services are not running, and all open files and processes are gracefully closed.
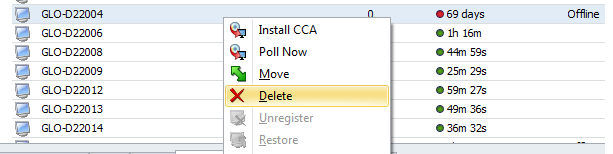
While the endpoint restarts, this would be a good time to remove it from the Management Console. Locate the errant system in the Management Console, right-click it and choose Delete
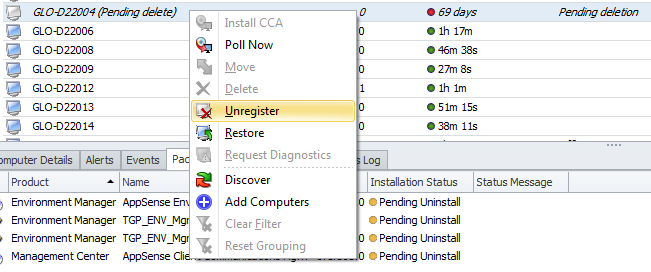
Once you’ve done this, the endpoint will appear as Pending Delete. To completely remove the reference to it, right-click on it again and choose Unregister. Once you’ve done this, when we finish the manual removal and reinstall the Client Communications Agent/Deployment Agent, there should be no room for duplication in the console.
Now, it is very important at this stage to use the correct Programs and Features/Add Remove Programs part of Control Panel to remove the parts of the software that you can. In this case, it was only the Performance Manager Agent and Application Manager Agent that were failing to remove, so we removed all the other agents and configurations via the proper OS method (in this case Add/Remove Programs). So, to save yourself a lot of trouble, remove all that you can via the normal methods and leave yourself with the parts of the software that are failing.
Once you’ve done this, the next stage is to clear out the remaining components from the file system. You will have to delete the folders listed below (if they exist – some may not dependent on your architecture and/or OS)
%programfiles%\AppSense
%programfiles(x86)%\AppSense
%programfiles%\Common Files\AppSense
%programfiles(x86)%\Common Files\AppSense
%systemdrive%\AppSenseVirtual
%systemdrive%\AppSenseCache
Make sure that you delete all files and subfolders from the areas specified.
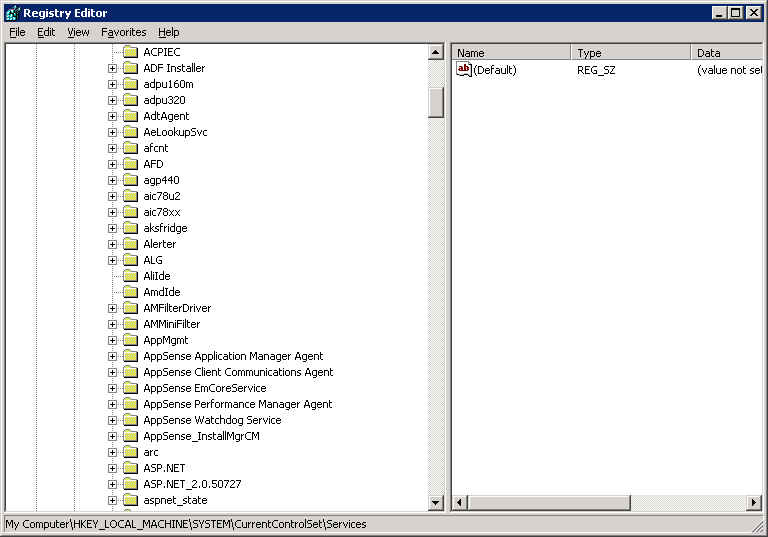
The next stage would be to clear the references to the relevant installed services from the Registry. These can be found in the following Registry areas (sometimes the ControlSetxxx numbers can vary from system to system)
HKLM\System\CurrentControlSet\Services
HKLM\System\ControlSet001\Services
HKLM\System\ControlSet002\Services
HKLM\System\ControlSet003\Services
The service entries we want to remove all begin with “AppSense” – you can see an example of these in the screenshot below. Delete each of these keys that you find.
 |
| The AppSense services Registry keys are shown here |
The next stage is to remove the installation Registry entries. These can be somewhat tricky to find. The first set of entries are in the following keys
HKLM\Software\Microsoft\Windows\CurrentVersion\Uninstall
and, on x64 systems, also may be found in this key
HKLM\SOFTWARE\Wow6432Node\Microsoft\Windows\CurrentVersion\Uninstall
The fiddly bit is that the keys underneath this key (or keys) may not have intuitive names – they may be down as SIDs (see screenshot below). The way to check this is to move down through the list so each key displays its details in the right-hand pane (again, see the screenshot), and when you find one that is related to AppSense, to delete the whole key from the left-hand pane. Be very careful here – you don’t want to remove the wrong ones!
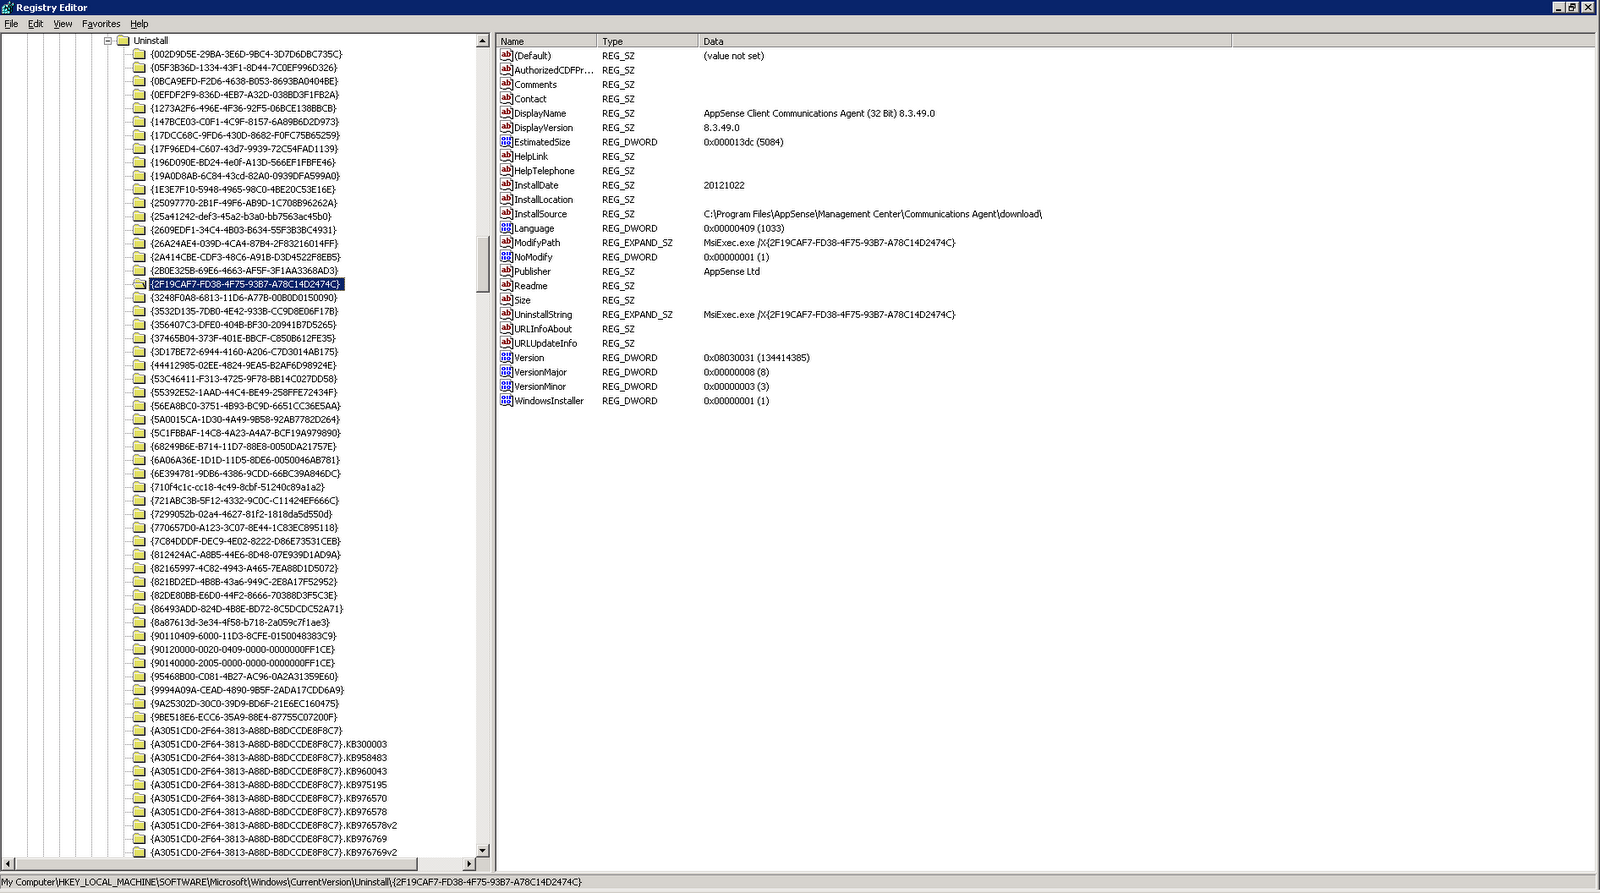 |
| Observe the SID in the right-hand pane and the details of the software showing in the left-hand pane |
If you’re on an x64 system, repeat the process of finding (and deleting, if you find any) the AppSense-related keys in the Wow6432Node key specified above.
Now you need to check another key in the same way as this to fully remove the installation Registry entries. The location is
HKEY_CLASSES_ROOT\Installer\Products
Again, the left-hand pane may not provide intuitive information, so you’ll need to scroll down again until you find AppSense-related products in the right-hand pane (see below)
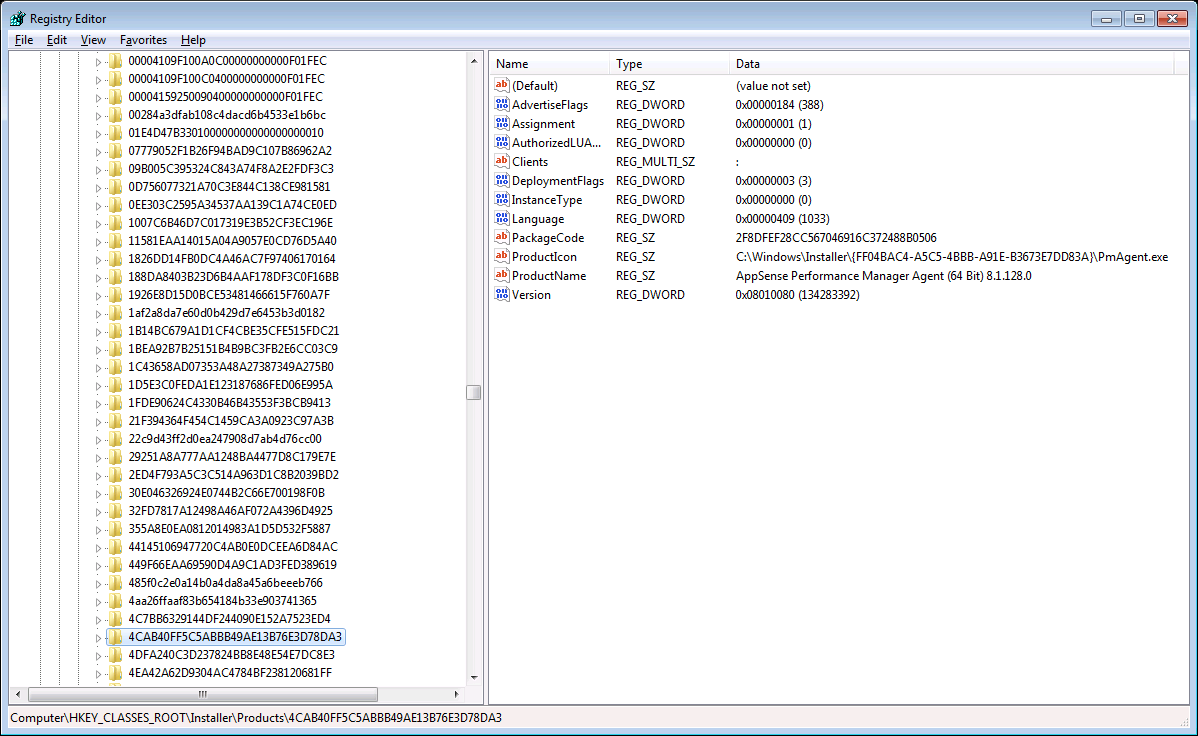
With care not to make any errors, delete the AppSense-related keys from the Registry.
Now, we’ve removed the main parts of the installation manually. At this point, you can make a decision whether you need it to be absolutely clean or just enough to function. I opted to reboot at this point and then reinstall the Client Communications Agent. The server picked up the CCA, I moved it to the correct Deployment Group, and at the next scheduled interval it installed the agents and configurations correctly – and without error.
However, if you want the system to be absolutely clean, you may want to go through the Registry and filesystem with a metaphorical fine-toothed comb, removing all references to the AppSense software. If you do choose to utilize this option, you may want to put a script together to help with this, as you may find a lot of references to AppSense, particularly in the Registry!
So that’s how to remove AppSense agents and configurations from an endpoint in a situation where normal uninstall methods don’t work. Don’t forget that this is simply my own way that I’ve seen work in practice – I’d be very interested to hear from anyone at AppSense whether there is a properly-documented way of doing this, and/or whether I have missed out any important steps. But if you find yourself in a situation where normal uninstallation doesn’t work – and let me make this very clear, this process is only to be used when all other methods fail – then the way described above will let you perform a new installation of the software without issue.

