
I see lots of different Environment Manager configurations, and some of them are very logically ordered, whereas others seem to be a completely topsy-turvy mess. Often a job that I find myself doing a lot is the re-ordering of the client’s configuration to put it into a more cogent state. One thing that the messier configurations seem to have in common is that they were not put together as part of any well-researched project – IT teams just installed the software, started experimenting to see what they could do, and the infrastructure simply grew outwards from there. This is not necessarily a bad thing if you don’t mind the mind-numbing job of re-ordering the configuration at a later date, but if you don’t have a specific list of requirements and systems to work with when you begin your AppSense implementation, it might save you some pain later to apply a little bit of thought to the configuration workflow before you start.
Let’s just quickly say that there is no truly right or wrong way to set your configuration up – each environment will have different needs and different process flows. But one thing every configuration should have is a logical structure and plenty of descriptive comments. There’s nothing worse than trying to hunt through a configuration designed by someone else that has no comments and is full of disjointed actions and conditions that have little or no thought behind their placement.
Naturally, it is the Logon and Computer startup triggers that suffer from these chaotic problems the most. Process Started triggers are naturally ordered by the various applications, whereas Logoff, Shutdown, Lock/Unlock and Connect/Disconnect triggers tend not to have a vast amount of configuration items attached to them (although if they do grow, applying some similar logic to them is the right thing to do!). In the interests of keeping it simple, we will concentrate on the structure for the Logon trigger, so we will start with a blank configuration and begin to configure the Logon settings. Bear in mind that this is simply a guide, so it may seem quite unsophisticated and full of overly-descriptive titles when compared with a “real” production configuration.
Firstly we will insert a node to ensure that only the users we wish to be managed by AppSense are actually processed. I’ve lost track of the amount of configurations I have seen where every single node begins with a Condition checking that the user is not an Administrator (sometimes this isn’t even a Reusable Condition!). By simply using an Active Directory group called AppSense_Enabled or similar and using this Condition in the very first node in the Logon trigger, we can ensure that only users in this security group are processed by AppSense. Naturally, you will need to make sure that your Administrators and other users exempt from AppSense aren’t in this group, however!
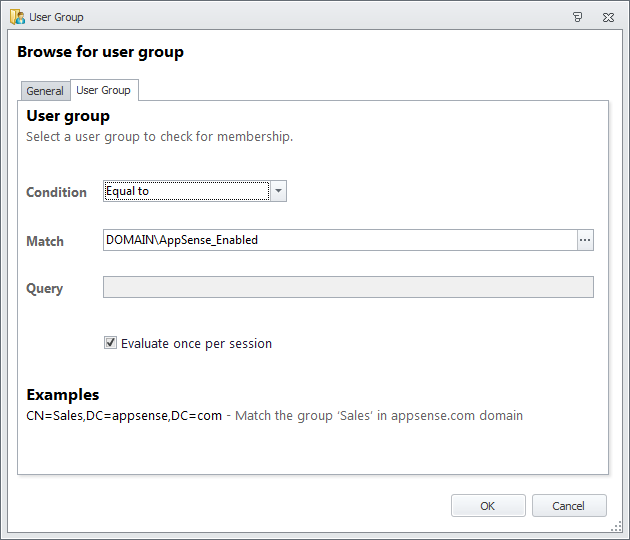 |
| The type of Condition that should be contained in your first node |
Those of you who paid attention to my post on Reusable Conditions will realise that this would be an ideal place to use one, so if you wish to do it this way (and you’d be silly not to), you’ll need to create the Condition in the Reusable Conditions section first before you link to it from your first node.
Now, the rest of the nodes we create will all be nested inside the first node. This is because by nesting we create a dependency on the first node – so if the AD group lookup is not successful, none of the nested nodes will be executed. Obviously this functionality is itself dependent on the “Stop if fails” checkbox being ticked for the link to the Reusable Condition (see image below)
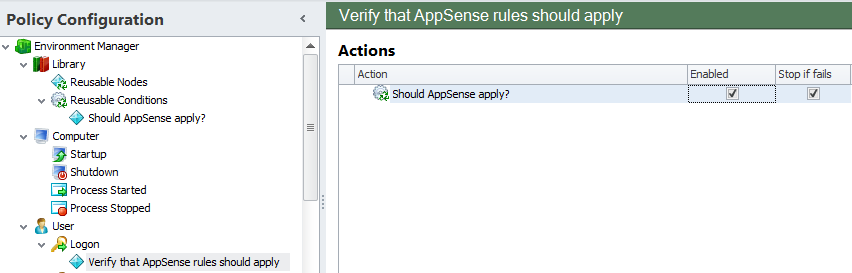 |
| The “Stop if fails” box should be left in its default state of checked on the Reusable Condition |
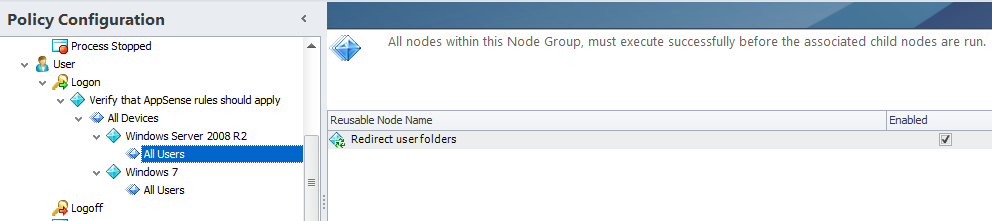
Next we will create another node, this time we will call it “All Devices”. This node will be a Node Group, because we are going to perform some actions in this section which we wish to complete before we move on to the child nodes of the node group. Don’t forget that we can only add Reusable Nodes to a Node Group, so our next action will be to create a Reusable Node of Actions to be performed here. The All Devices node group will contain Actions that should apply to all devices regardless of operating system, architecture or type.
For the Actions we’re adding here (mainly as a demonstration of what’s possible by using Node Groups), we’re going to borrow from AppSense’s own excellent example, using an If Else Group to set the user’s SID as a variable. Setting this variable is a great idea if you are using the Profile State Emulation trick covered in this post – it saves the need for the custom VBScript specified in my article and lets you simply read it in from a variable. The use of PowerShell, Registry settings or WMI (dependent on OS) makes it particularly elegant.
-2-1-1.png) |
| The Node Group added to the parent node, with the link to the Reusable Node showing in the right-hand pane |
The next set of nodes, which will be nested inside the Node Group and therefore won’t begin execution until the Actions in the Node Group have completed, will deal with segregating the next sets of actions by device type. You can get very granular here if you need to – running particular Actions for Operating System, CPU Architecture, physical or virtual, XenApp version, etc. For this example, we will assume we are working in a simple environment where there are simply XenApp 6.5 and Windows 7 endpoints to manage, so we will set two OS Conditions to distinguish these two device types.
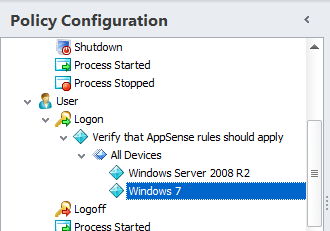 |
| The new nodes created under the All Devices node |
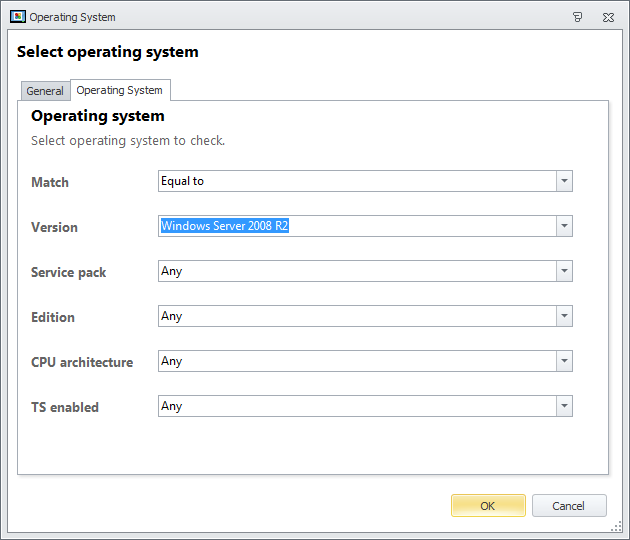 |
| Selection of the OS Condition – you can see here just how granular you can get, if needs be |
At this stage, you should add Actions to these nodes nested underneath the OS Conditions in the right-hand pane, if any are required specifically. We aren’t going to do this – let’s just get on with the configuration workflow and see how it maps out.
Next we will use another Node Group because we are going to start with the user-specific settings now. One of the things Node Groups are very useful for is ensuring that certain settings are met before other, dependent Actions begin to execute. In this case we want to ensure that Folder Redirection (as an example) is set before we begin other user Actions (such as copying files into the redirected desktop folder, for instance). So we will create a Folder Redirection Action for the Desktop and add it to the Reusable Nodes Library, then add a new Node Group and title this one “All Users”. Note that you’ll need to add the Node Group under both of the OS nodes. You could do a whole lot of other stuff here that may or may not be required by all of your AppSense-managed users – think a global drive mapping, base shortcuts, IE home page, etc. – but we’ll just leave it at the one Action for this example.
 |
| The All Users nodes showing the link to the Folder Redirection actions |
Still with me? We’ve nearly reached the end of this simple configuration workflow. Finally we going to add a couple of nodes under each of the All Users groups called Standard Users and Power Users. There are often requirements to provide different groups of users with different policy settings, so we’ll demonstrate it simply here. Naturally, the Condition associated with each of these new Nodes is a check of an AD security group.
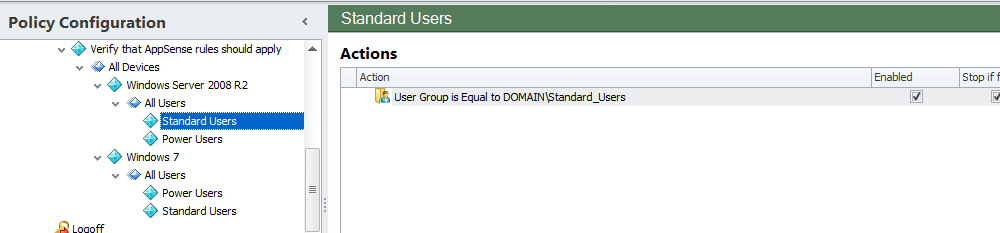 |
| The new user-based nodes with their associated AD Group Conditions |
And underneath these nodes, we will put nodes that hold Actions for these various sets of users. We’re not going to bother configuring any Actions here – I’m sure you all know how to set up Actions by now – but we will create a few of the nodes to give you an idea of the sort of things you might find here. Observe that we’ve started with Group Policy Objects, Drive Mappings and Desktop Shortcuts – but you can probably think of a whole load more 🙂
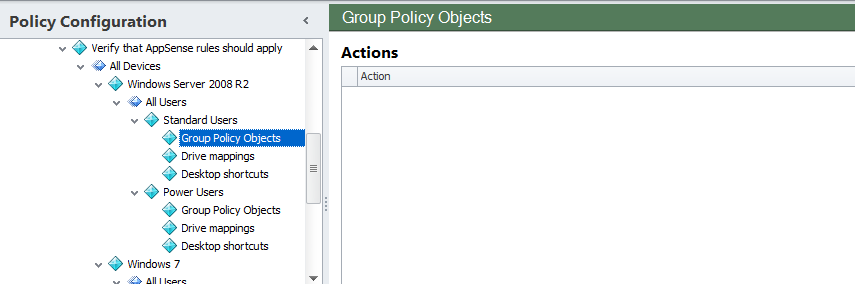 |
| Finally, we land into the nodes where we will probably do some serious Action creation |
Well, we’ve now run through a very basic AppSense Environment Manager configuration workflow that shows the sort of structure that you may need to adopt, to ensure your configurations are more orderly than some of the ones I come across! Bear in mind that this is simply a very brief example, and that no two configurations will ever be the same. However, adopting this sort of structured approach should make your configurations easier to adapt, simpler for people to follow, and scalable in the event that your business radically changes or grows through expansion.
Finally, as mentioned earlier, there’s a configuration of the simple example we did available for download here. The usual disclaimers apply 🙂

