
For today’s instalment of AppSense-y goodness, I’m going to quickly run through how I used AppSense EM to change the Windows 8 startup screen image – not that you particularly need EM to do this, it just happened to be the tool I used.
The Windows 8 startup screen
Like a few other features of Windows 8, the logon/lock screen that you get by default sucks. Is it supposed to be the Seattle Space Needle? It’s hardly globally recognisable or awe-inspiring, to be fair.
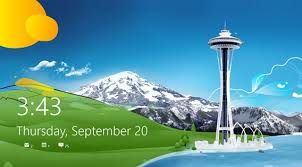
Windows 8.1 gives you a different one – but again, hardly takes the breath away.

Now I’ve got some great wallpapers on my machine that I got from Ryan Bliss (@dblasphemy) over at Digital Blasphemy, I think I’d much rather have one of these as my startup image and lock screen image. With all due deference and credit to Ryan for reproducing his work (I did pay for a subscription), do you think something like this would look better?

Well, I definitely do, so let’s waste no more time and start digging to see if we can change it.
Lock screen or logon screen?
You can change the lock screen by using a GPO, but this doesn’t affect the logon screen as well. If you’re interested in doing it this way, the computer must have the following update applied – KB2770917, Windows 8 and Server 2012 Cumulative Update Nov 2012. Then, you should be able to alter the following policy object – Computer Config | Admin Templates | Control Panel | Personalization | Force a specific default lock screen image
The Registry key which this GPO writes its data to is located at HKLM\SOFTWARE\Policies\Microsoft\Windows\Personalization\LockScreenImage
However, if, like me, you’re wanting to change the initial logon screen too, then you need to dig a bit deeper. I decided to perform these actions through Environment Manager, but you can easily do them any way you want – through Group Policy, a script, a golden image, any one of a number of ways.
The nitty-gritty
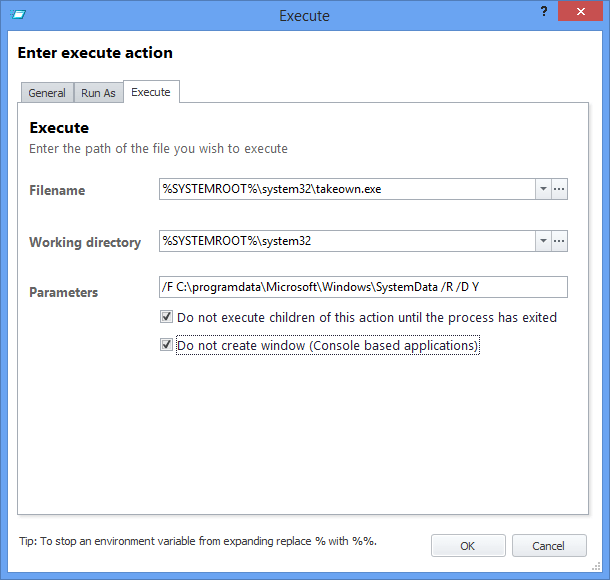
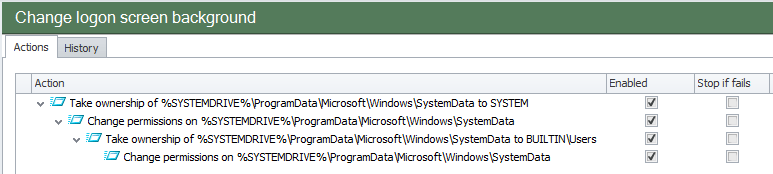
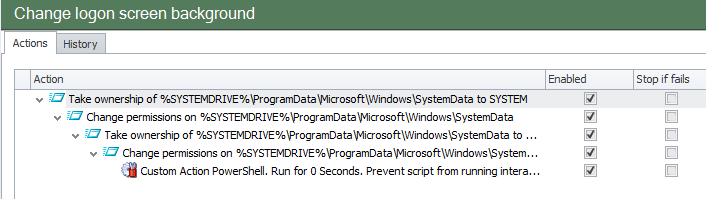
1. Take ownership of %systemdrive%\ProgramData\Microsoft\Windows\SystemData, to the SYSTEM account
I’ve used the builtin takeown command for this – just don’t forget to run it as SYSTEM (which should be default if you’re putting this in a Computer Startup trigger like me)
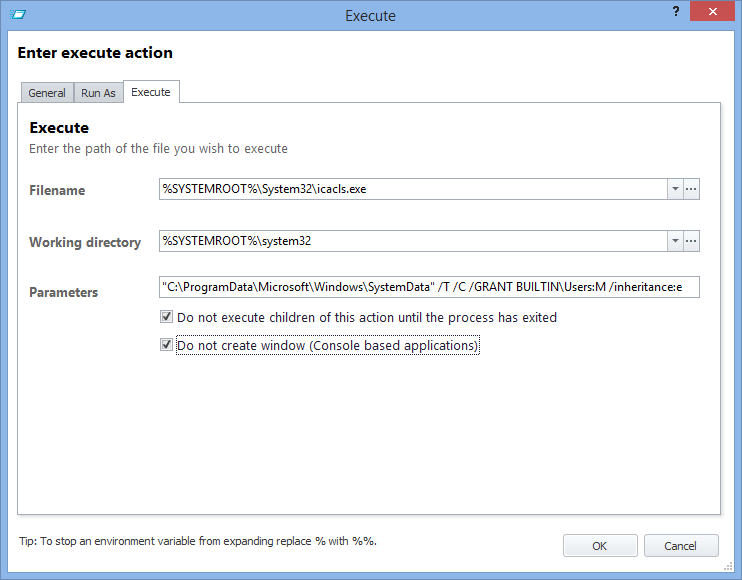
2. Replace permissions on this folder, giving SYSTEM Full Control and enabling inheritance.

I wrote a post some time ago that discussed changing filesystem permissions using Environment Manager, we’re using the icacls.exe route rather than PowerShell (as today legacy binaries feel like more fun)
3. Repeat the take ownership process, only this time we are giving ownership to the BUILTIN\Users group. We will need to use subinacl.exe for this, as takeown.exe can’t change ownership to other specified groups (download subinacl here if required). This permission will revert after a restart – we just need to get it set for this part to work.

4. And we also, as above, need to give the BUILTIN\Users group Modify permissions, and again enabling inheritance
These Actions should all be nested nicely together as so
The tricky nitty-gritty
Now it’s time for the tricky bits! In the folder C:\ProgramData\Microsoft\Windows\SystemData\S-1-5-18\ReadOnly\LockScreen_Z you will (now be able to) see the current image shown:-
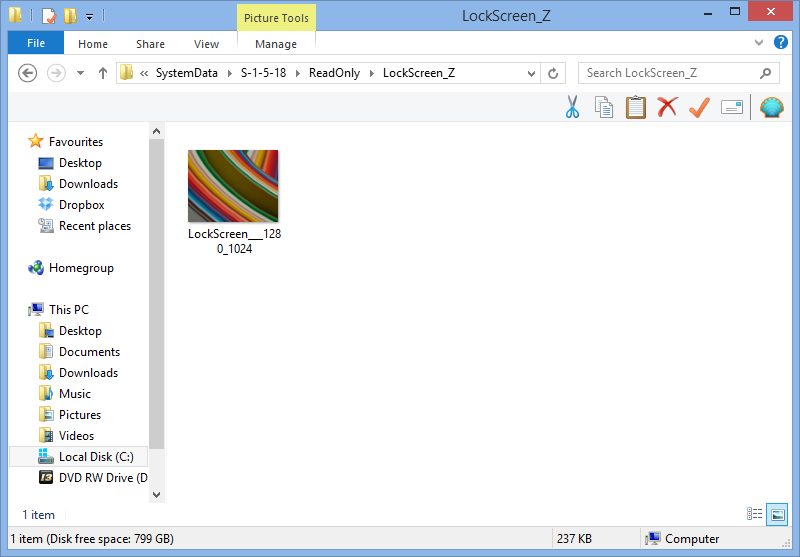
The fiddly bit is, the name of the file differs from system to system (it appears to append the resolution to the end). What we need to do is create a new file with the same name as the old one shown, replacing it with our new image. Hmmm…
(Yeah, OK, it’s straightforward with a bit of PowerShell!) This assumes that, as usual, there’s only the one file in that folder, though – if you’ve done anything like create a backup subfolder or extra files you will need to parse the output for the correct file to replace
Remove-Item C:\ProgramData\Microsoft\Windows\SystemData\S-1-5-18\ReadOnly\LockScreen_Z\$filename
Copy-Item c:\Temp_Pics\NewLockScreenImage.jpg C:\ProgramData\Microsoft\Windows\SystemData\S-1-5-18\ReadOnly\LockScreen_Z\$filename
Now, we need to save this as a Custom Action and nest it under the preceding Actions
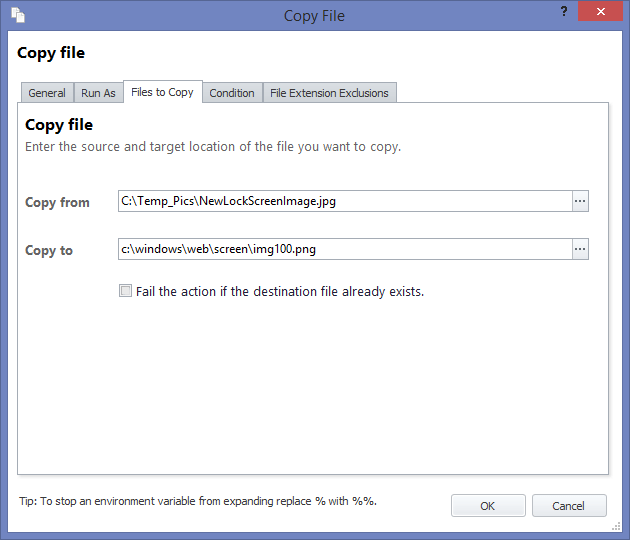
There’s one more file copy to do – we also need to replace the file %systemdrive%\windows\web\screen\img100.png with our new image. As this is a static filename (thankfully!), a standard EM Copy Action will suffice. And yes, even though our source file is a jpg, we are renaming it to a png file.
Testing
Next we need to test. Obviously, the savvy amongst you will have noticed I am using a source file on the local drive. If you’re wanting to distribute a file from a network location, you will need to do some additional work to get this up and running properly.
You may need to restart twice to see the logon screen in its glory, as EM will run the file copy at startup and by that time the logon screen may already be displayed. But if you lock the machine (or simply log out after the first restart), you should see your new funky logon screen background in all its radiant glory! Here’s what I have now for mine….
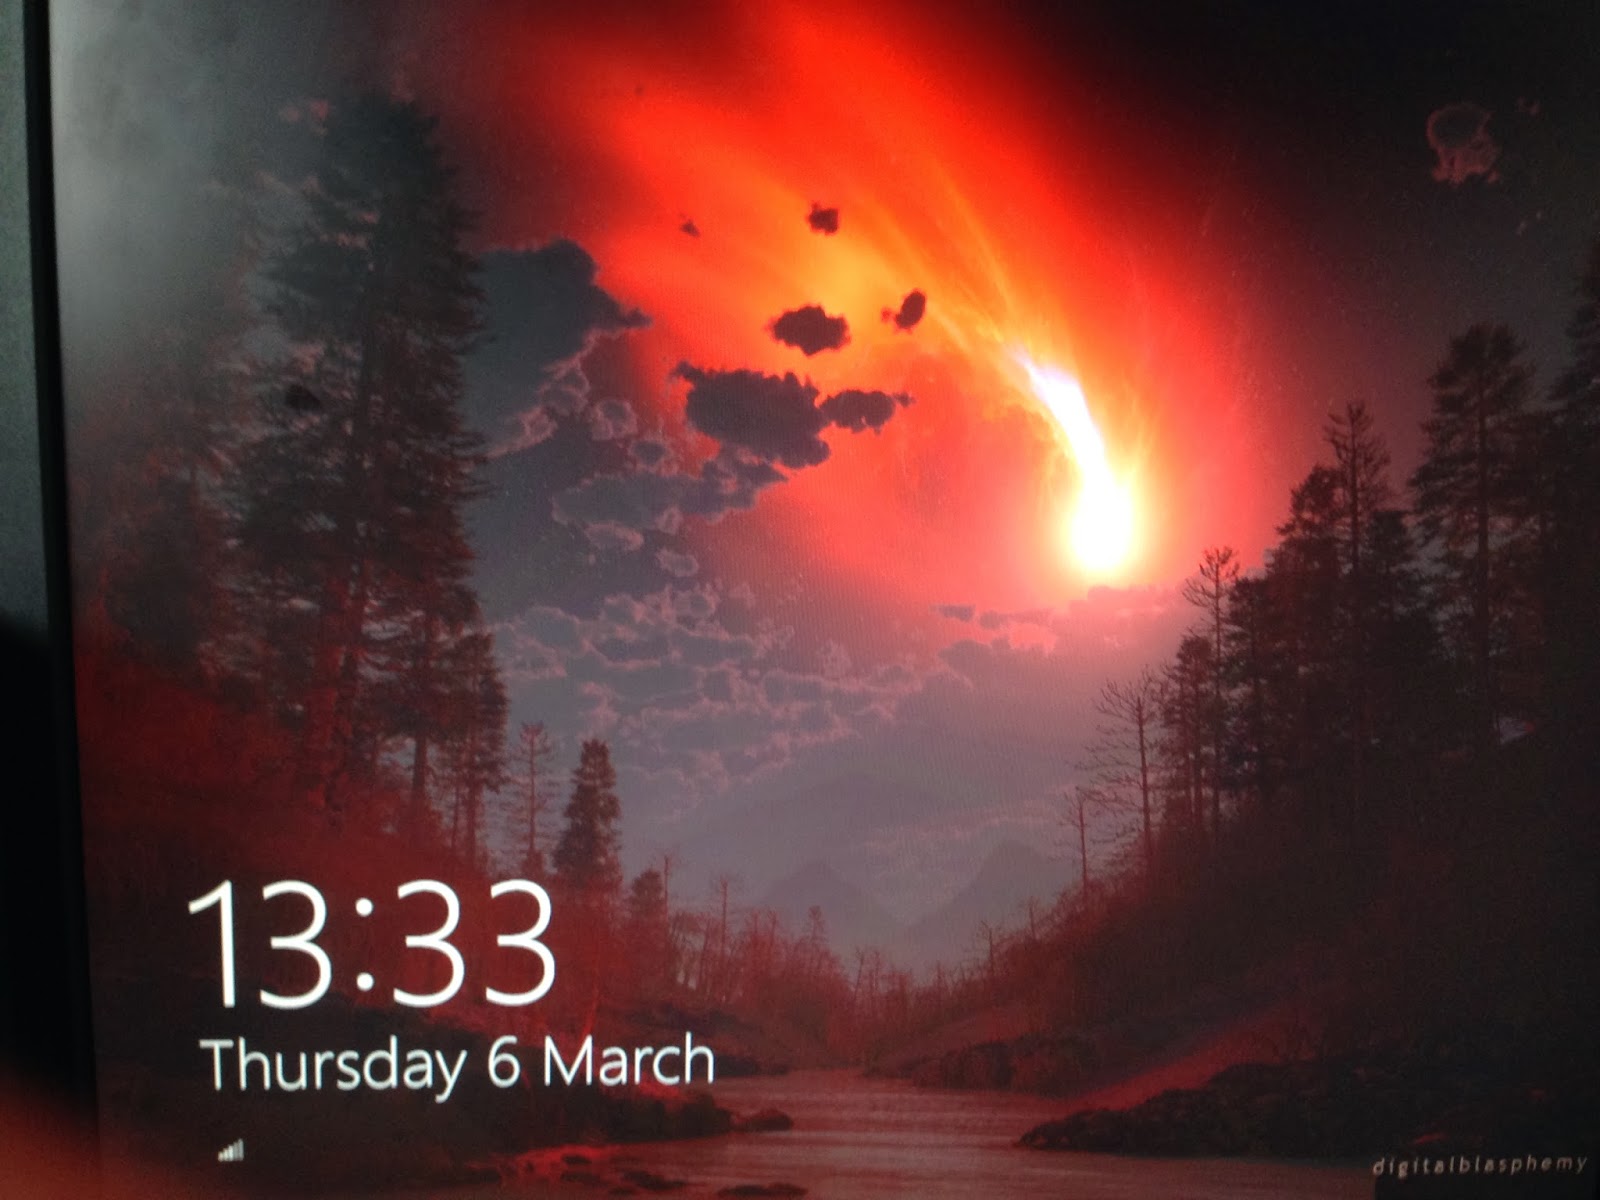
(Yes, Ryan Bliss is an amazing artist, check out his website at www.digitalblasphemy.com)
So that’s how we can use DesktopNow Environment Manager to change those awfully average default Windows 8.x logon and lock screens. As I said before, you can do this using many other methods – but the process will need to be much the same (rather convoluted) procedure.
One thing I didn’t test was what happens when you change the screen resolution or add more monitors, so if you’re putting this out in an enterprise environment, you may want to add an extra couple of layers to your testing. I’m fairly sure that the changes should stick (MS would cop some awful stick if images reset every time you changed the resolution), but it always pays to make sure.
Finally – the config I used to make this work is available here for download, should you wish to obtain it.

