
AppSense DesktopNow version 10 has landed, bringing with it a raft of new features and improvements on the old version 8. One of the ones I was looking forward to was the ability to create custom Outlook signatures for users as they log in for the first time. It’s always been possible to do this with scripts, but it was quite complicated and often resulted in some “weirdness” as Word and Outlook processes fired up at logon time.
I’ve worked at a number of places where users have to set up a “corporate standard” signature, even to the extent of matching fonts and colour to ensure that the branding remains consistent across the enterprise. Being able to set this up on-the-fly without too much complexity certainly sounds like a good idea, no?
Active Directory
However, one of the first things you need to do is ensure that the information you’re going to pull in for the user is consistent in Active Directory. You can’t use environment variables to set up a signature (unless you just want it displaying your username). Many people will want something simple such as the user’s name and email address next to static contact information such as company name, web address and postal address, so as long as the relevant fields in the Active Directory user object are populated correctly, we should be able to pull this in to AppSense and use them to populate the signature.
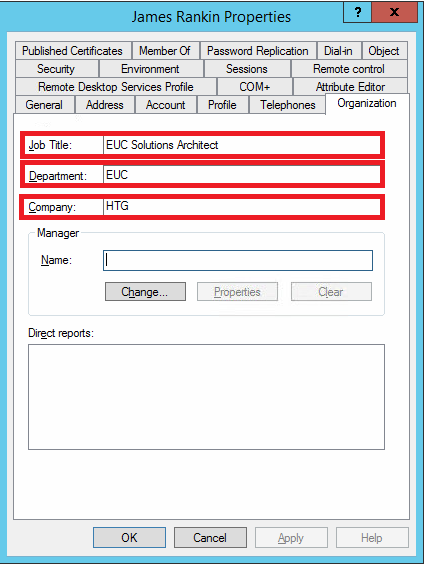
In the interests of completeness, though, we are going to pull quite a lot of detail from the user object for this example. In the images underneath, you can see how we have entered the relevant information on the user object. The fields we are going to pull in to populate the email signature are highlighted in red
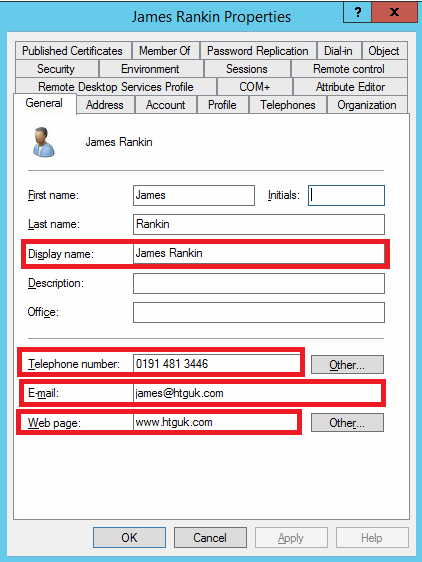
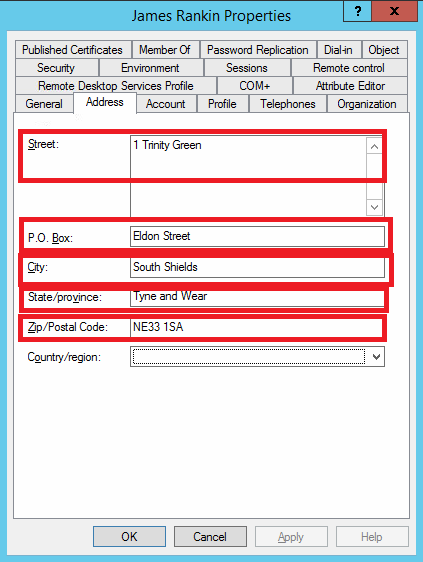
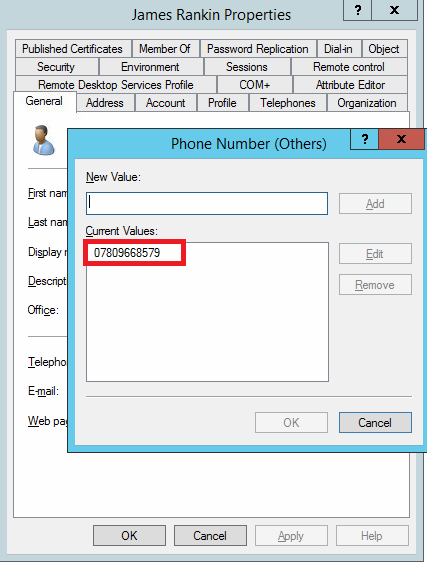
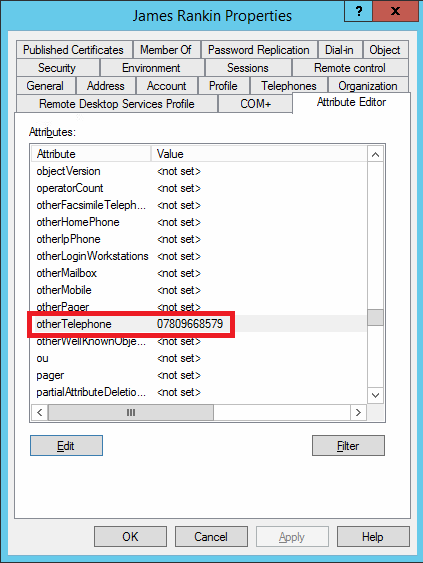
Worth noting is the fact that we’ve used some fields for purposes that don’t seem to fit with the name – for instance, we’ve used the Post Office Box field to hold the second line of the postal address. It doesn’t matter how you use them – you could put the company name in the postcode field if you wanted – as long as it is consistent across all users. We’ve also used the Other button from the General tab’s Telephone Number field to input the user’s mobile number – but we could also have used any of the fields from the Telephones tab on the user object. As I said, it’s entirely up to you how you populate the information – just make sure it is consistent!
What you will also need to do is open up the Attribute Editor tab (you need Advanced Features turned on in the AD console to see it) so that you can match the actual attribute names with the fields on the user object. Some are self explanatory – for instance, Department maps to department – but others are not so obvious. Take the field for City, for instance – the actual attribute name is simply l (that’s a lowercase “L”). In the example below, we’re showing where the field for the Other telephone number is stored, with the name of the attribute on the left.
Once you’ve populated all your attributes correctly (and made sure that all other user objects have them populated correctly – this may be a time to do some bulk AD attribute updates via a script), then we need to do a little bit of PowerShell in Environment Manager to set these AD attributes as session variables.
Session variables
Session Variables are really useful, and they don’t have the overhead of environment variables. When we set a session variable (for instance, for the user’s phone number) that variable will only exist in the context of the Environment Manager session and can only be read and manipulated by the EM process itself.
In order to set them correctly, we need to read them in at a particular time. During the user logon is the option we’ve gone for here, but if you want to avoid overhead you could do it after logon or even when the Outlook process starts. We’re going to do it in PowerShell, although I am sure it could be done via VBscript or even using batch commands. However as we are doing it in PowerShell we won’t have to rely on external files or commands.
We are also going to do it natively though PowerShell rather than having to load the RSAT tools on our endpoints to get access to the specific AD cmdlets. A big thanks has to go to Freddy Grande for providing me with the lines of PowerShell to do this – I was thinking I might have to load the RSAT tools directly into my image before he mailed me this excellent solution.
The first thing we need to put into our Custom Action are the AppSense PowerShell modules, otherwise we won’t be able to create Session Variables from within the script
# Import AppSense PS module
Import-Module ((Get-ItemProperty ‘HKLM:\SOFTWARE\AppSense\Environment Manager’).ClientPath + ‘EmCmdlet.dll’)
Once this is done, we can set up the directory service search (this is where all the neat stuff happens, thanks Freddy!)
# Prepare to pull Active Directory user information
$UserName = $env:username
$Filter = “(&(objectCategory=User)(samAccountName=$UserName))”
$Searcher = New-Object System.DirectoryServices.DirectorySearcher
$Searcher.Filter = $Filter
$ADUserPath = $Searcher.FindOne()
$ADUser = $ADUserPath.GetDirectoryEntry()
Next we can pull the information from the user attributes we identified, and set them as Session Variables (with more intuitive names too!)
# Set user attributes as session variables
Set-SessionVariable -Name Name -Value $($ADUser.displayName)
Set-SessionVariable -Name JobTitle -Value $($ADUser.title)
Set-SessionVariable -Name Department -Value $($ADUser.department)
Set-SessionVariable -Name Company -Value $($ADUser.company)
# Set address as session variables
Set-SessionVariable -Name AddressLine1 -Value $($ADUser.streetAddress)
Set-SessionVariable -Name AddressLine2 -Value $($ADUser.postOfficeBox)
Set-SessionVariable -Name City -Value $($ADUser.l)
Set-SessionVariable -Name County -Value $($ADUser.st)
Set-SessionVariable -Name PostCode -Value $($ADUser.postalCode)
# Set other details as session variables
Set-SessionVariable -Name OfficeTelephone -Value $($ADUser.telephoneNumber)
Set-SessionVariable -Name MobileTelephone -Value $($ADUser.otherTelephone)
Set-SessionVariable -Name Email -Value $($ADUser.mail)
Set-SessionVariable -Name WebPage -Value $($ADUser.wWWHomePage)
This will set all of our Session Variables ready for manipulation in the Email Signature Action.
Setting the signature
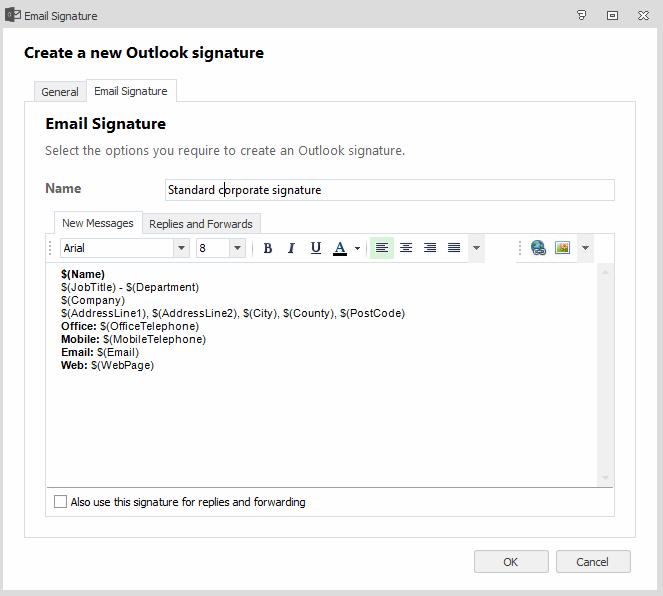
You can find the relevant Action under Actions | Outlook | Email Signature. The dialog you are presented with is (as you’d expect) very similar to the Signatures dialog in Outlook itself. You can manipulate it in the same ways – put as much static text and images in it as you need, and simply use the Session Variables to hold the user-specific information. Our example is shown below
It’s also up to you whether you want to enforce the signature in each user session (i.e. prevent the user from customizing it), or simply run this the first time they log on and then let them make changes. If you wanted to just run it at first logon, the easiest way would be to set a flag (like a Registry value) to something like CorporateSignatureSet, and then use the existence of this flag as a trigger to avoid running the Email Signature action during future sessions.
Results
So now we can log on and see what our custom signature looks like. Once we connect to our Outlook account (which should be fairly straightforward, as we’ve correctly populated the Email field in Active Directory!), we should see that when we create a new email, our signature is already present and assigned…
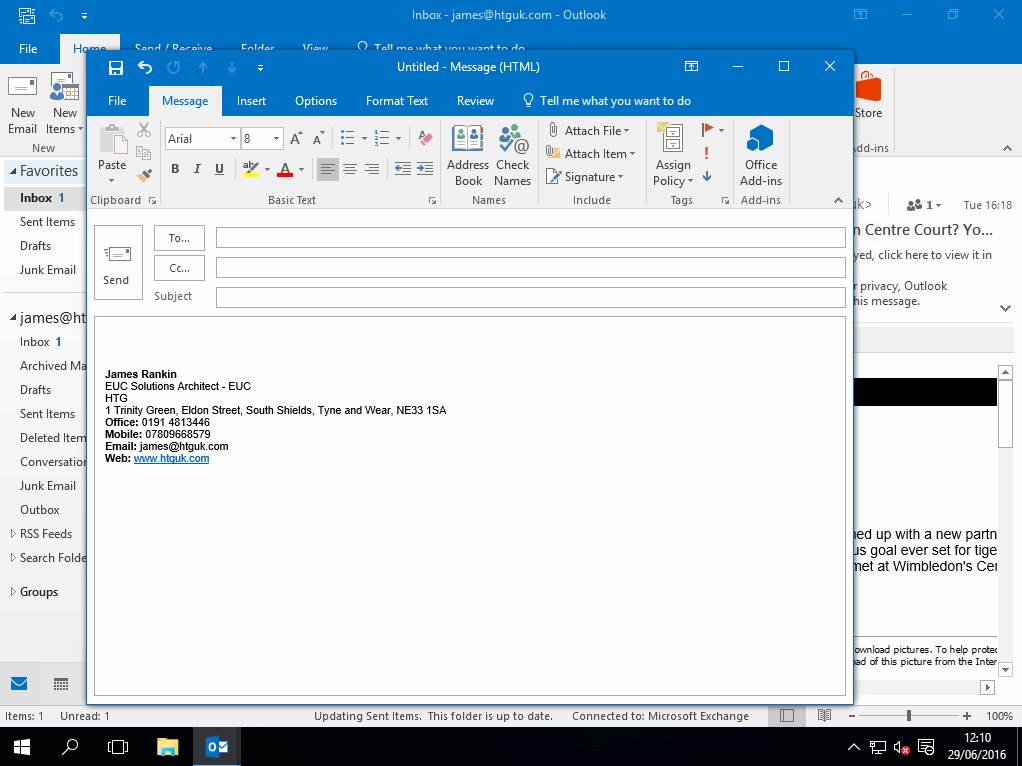
Awesome…fully pre-populated, no need for user intervention, it’s all set up and ready.
Summary
So as long as you keep your Active Directory information current, you should be able to use this technique to create customized signatures based around the user object information, without the need for complex scripting.
There are also other features for Outlook that I’ve yet to test out in version 10 – setting up Office 365 profiles being the one I’m most interested in. More on that and other features in coming articles.
Update
There is currently a slight bug in the AppSense implementation of this technique – if you utilize more than nine variables in the signature, it may not work correctly. However I have reported this and it should be fixed hopefully pretty quickly – I will update this post when it is. Of course, if you’re using eight or less variables in the signature (and I can imagine a lot of people won’t need this many – things like company name, web address, office address and office phone number are often completely static), then you should be good to go with the current version.

