
This is going to be another of those absurdly-titled long posts (like this one), where I go around the houses attacking a problem before arriving at a completely different decision. But hey! I enjoy the journey and the learning. Where are we off to this time?
I’ve been doing some work in higher education recently and the requirement we started with was to split a single desktop image into two distinct environments, Students and Staff. The Student desktop was intended to be limited in functionality for most applications (the idea being that “teaching” apps would always be in a pristine, non-customized state), whereas the Staff desktop would be almost a “regular” environment with fully customized apps and workspace. I’ve been down this route before, but the difference this time was that the “Staff” desktop would offer them a choice between logging in to their normal work environment and logging in to the “Student” one. Naturally I first suggested simply giving them a “Student” user account in addition to their “Staff” one and subdividing the environment around the userid, but they wanted access to these two distinct areas provided to a single user account for each person.
So we had the following unusual requirements:-
- Configure some way of offering users a “choice” of desktop after they log in
- Adding an audio element to the “desktop choice” to remind users that it needed to be interacted with
- Disable Personalization for the Student desktop, and enable it for the Staff desktop
Requirement #3 is the most interesting, mainly because you can’t set Personalization Server membership rules based around anything other than user or device specifics, so that looks fairly challenging. But anyway, let’s get on with the journey.
Setting the “desktop choice”
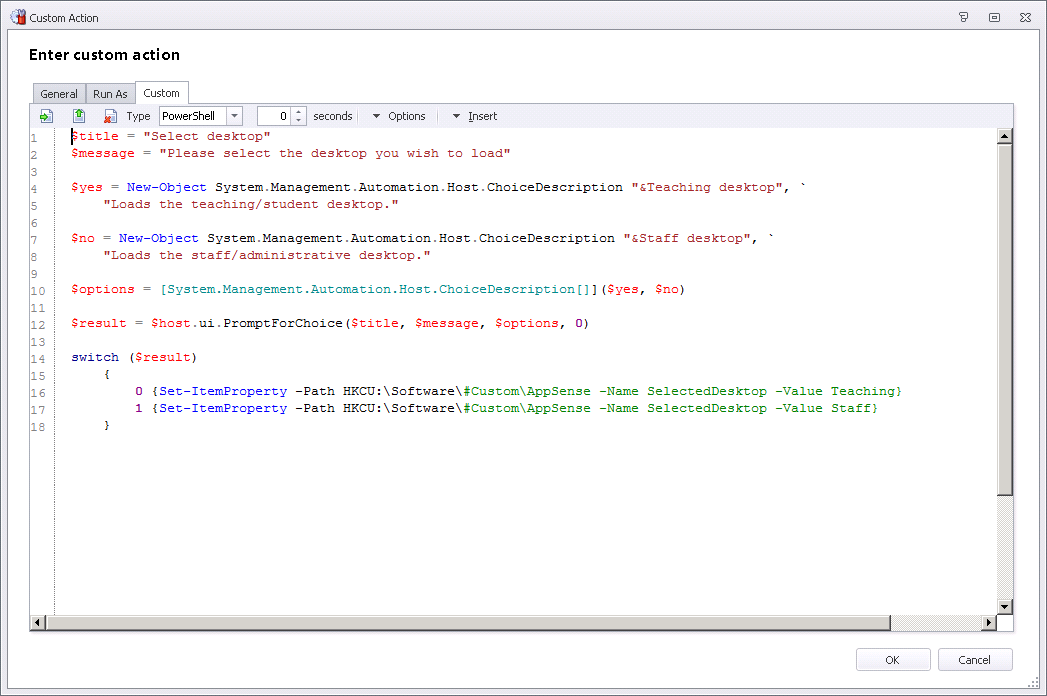
I’m no developer, so this was always going to be rudimentary. What I had in mind was calling out to a script at the start of the Desktop Created trigger and setting a Registry value based on the user’s input, which could then be used as a Condition in the child nodes to set the look and feel of the environment. The key part was stopping the execution of the entire logon in order for the choice to be set, which we did by nesting a child action underneath the script and making all other nodes dependent on (children of) this one.
We used PowerShell to ask the user for input
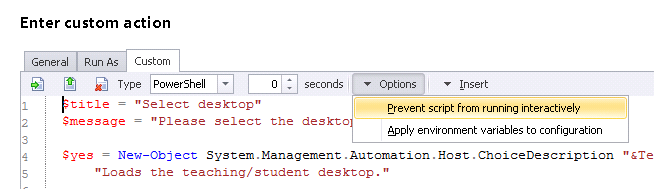
Naturally, we unset the “non-interactive” option to allow the PowerShell to be seen by the user
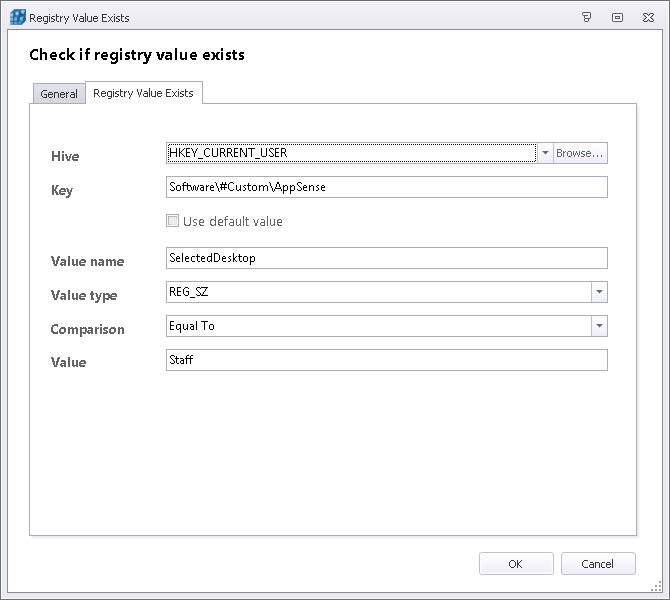
and then we can use the Registry value set by the user as a Reusable Condition to ascertain which environment was selected. Note that the Registry key you’re writing to actually needs to exist or the script will fail trying to write the value, so either make sure the key is in the base profile or do a bit of If Condition magic to make sure it exists before executing the scripted Action.
So, when the user logs on, they are presented with this choice (see image below). If they select something other than the two choices, they are asked to choose again – if they escape the window or close it, they are sent to the default (Student) environment. Cool!
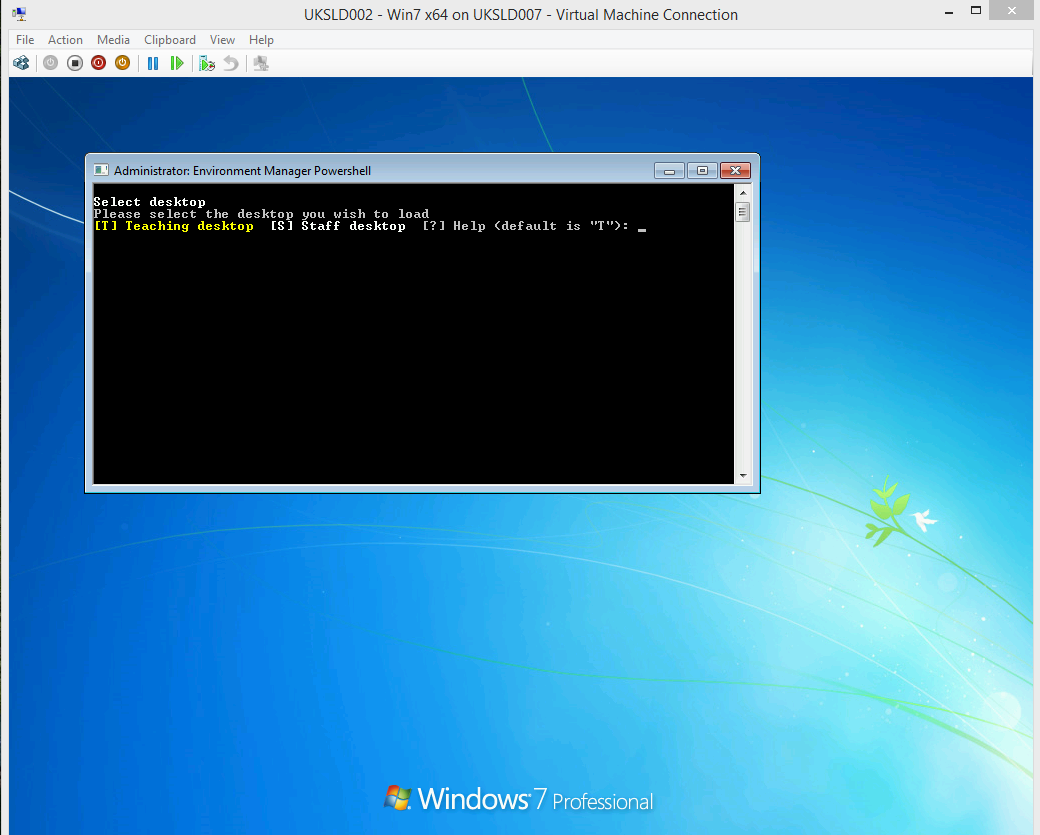
So that’s the first requirement fulfilled – although not particularly pretty (the guys I am working with actually tidied this up using WinBatch and gave me a nice interface which I could call from a VBScript Action). Now, what’s next?
Audio reminder of logon choice
Now this is a bit more challenging – but luckily I follow Jeffery Hicks on Twitter and I remember him posting a bit of PowerShell once that I could possibly use to achieve this without too much fuss. Thanks Jeff (and your PowerShell book is very good too!)
What we are going to do is simply insert some more PowerShell into the bit we’ve already done so that the choice is spoken to the user as well as presented in a console window.
Obviously the success of this is dependent on the user actually having a sound card and the sound audible – you can do cool things with the PowerShell SpeechSynthesizer object such as increase the volume and whatnot, but that’s a bit out of scope for this article, although there are some good articles out there on the Interubes about the various properties available. For our purposes, we’ll assume anyone that the audio reminder is applicable to will have sound configured correctly.
I was also running this on Windows 8.1 so I get the choice of four different voices – Microsoft David (American), Microsoft Zira (American), Microsoft Hazel (English) and Microsoft Heera (Indian). On Windows XP you used to get the well-liked Microsoft Sam, but in Windows 7 Sam was killed off and replaced by the robotic and despised Microsoft Anna. If you’re doing this on 7 you can download extra voices here – but you will need to change the script below for your operating system voices, should you want to do this bit.
If you want to see the voices you’ve got installed on your system, run these commands in a PowerShell console
Add-Type -AssemblyName System.speech
$speak = New-Object System.Speech.Synthesis.SpeechSynthesizer
$speak.GetInstalledVoices().VoiceInfo
Anyways, the modified AppSense Action to get the speaking component added looks like this
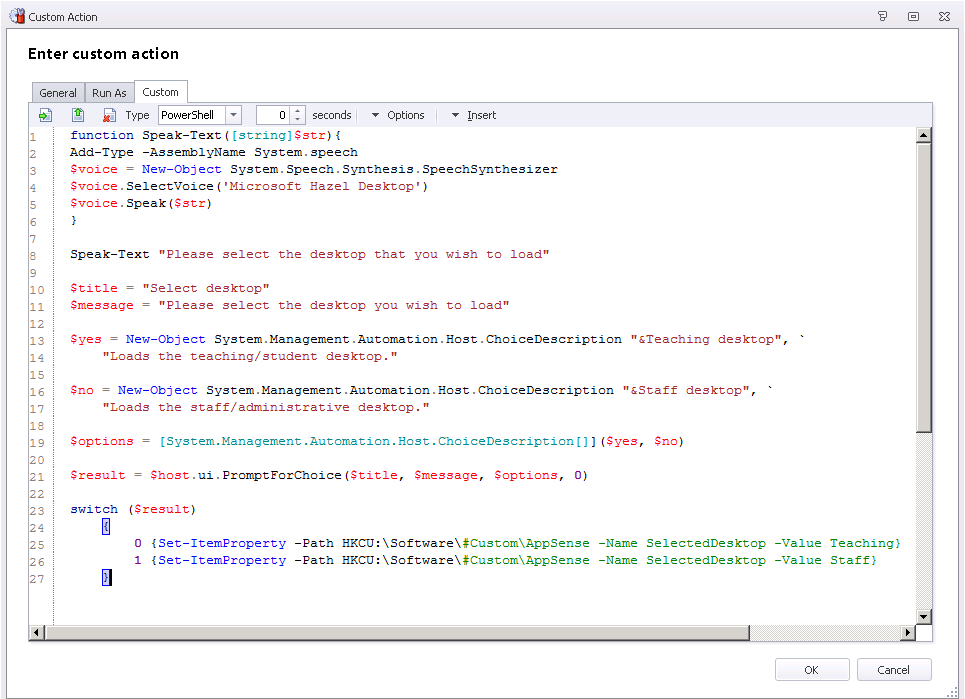
So now, when the “logon choice” box runs, we get the command spoken as well. Probably not very useful in most environments to be honest, but it was asked for in this example – and frankly it’s quite a cool demonstration of stuff you can do with PowerShell 🙂
Enable or disable Personalization based around the Registry value we set
This is the tricky bit. For the Student desktop, Personalization is to be more or less disabled, whereas it was to be fully enabled for the Staff environment. I’m sure you’re all very aware that Personalization can only be set on user or device specifics, and the Conditions for membership of Personalization Groups don’t yet encompass the full spectrum of EM Conditions available in Policy. (Please please please, AppSense, add this in as a feature in future – it would be really useful!)
So the first thing I thought of was to set the Personalization Server ADMX files based around the Registry key, pointing them to a “dummy” Personalization Server if the Student value was set and the real one if the Staff value was set. Sounds good…
…apart from it doesn’t seem to work in testing. If you have an ADMX file that points only to a fake Personalization Server, it seems to go running back to the one stipulated in the actual EM config file.
Next I tried to think of some way of “killing” Personalization. There are some Registry values that will stop Personalization from happening, namely
HKLM\Software\AppSense\Environment Manager
RegistryVirtualization DWORD 0
FileVirtualization DWORD 0
although you have to restart the Environment Manager/User Virtualization service afterwards to make this work. This sounded doable, though…
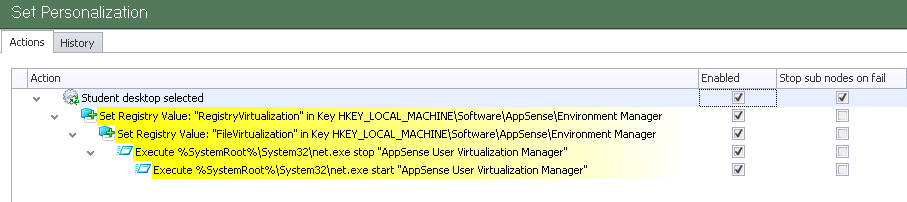
…but as you may have guessed, when the service stops, the policy stops, so the service never restarts or sits in a “stopping” state. What can we think of next?
Continuing on my thoughts around enabling Personalization in the configuration but then making it impossible to happen, I wondered if I could use some trickery with the hosts file to point the user to a fake server? Again, this sounded like it had potential…so we set up a hosts file with an incorrect entry for the AppSense Personalization Server and put it in a network share
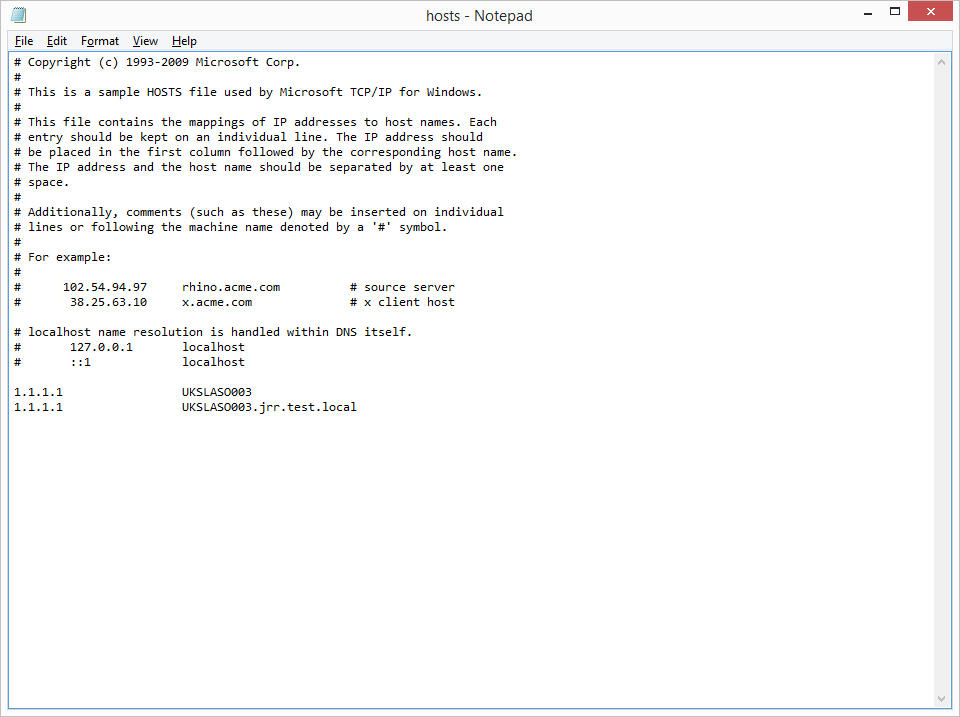
and then set our AppSense Actions to copy it in if the Student desktop was selected, and then flush the DNS cache

This actually worked quite well, as long as we remembered to restore the original hosts file when the Staff desktop was selected. However, you couldn’t do this at logoff, as the logoff actions run before Personalization and Windows Personalization Groups would then synchronize when you didn’t want them to. There was also the issue that as we were testing with a combined Management/Personalization server, when the Student environment was selected new configurations couldn’t be deployed or event data uploaded, as the endpoint simply couldn’t contact the Management Server. So it was effective, but it felt like it was a bit of a botch job and probably could cause problems in future.
Of course, then I noticed the obvious answer sitting in front of me. Why bother with all of this – why not just have two Personalization databases and instances, one for Staff, one for Students, and never the twain shall meet? This solution seemed even more suitable when the client announced that the Students might actually be allowed to Personalize certain applications such as email and intranet. There was no reason that Staff would ever need their Personalization in the Student environment – access to it was only ever intended to be used for testing, training and troubleshooting. So why not just have two completely isolated environments?
Setting up multiple Personalization Server instances
Luckily, in EM 8 FR 5 AppSense provided the capability to host up to sixteen instances on each Personalization Server, otherwise this would have necessitated a whole new server to support it.
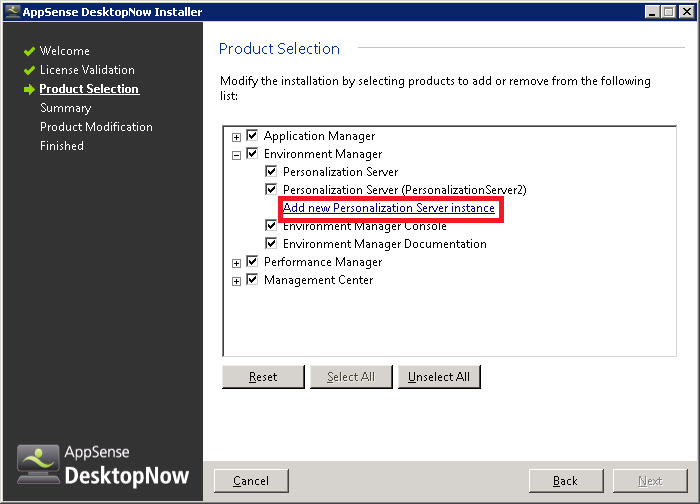
On your Personalization Server, re-run the AppSense DesktopNow setup and choose Modify. On the Product Selection screen, expand Environment Manager and you will see Add new Personalization Server instance
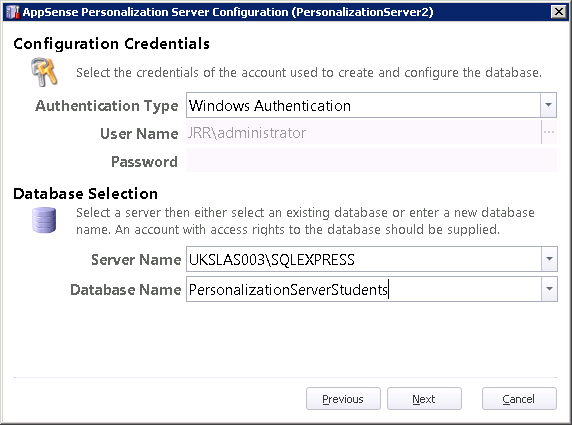
Once this is done, you will need to configure the instance to point to a new database and set up a new website in IIS to support it. In IIS Manager, I simply created a new website called PersonalizationServer2 running on port 81

and then connect to this site in the Personalization Server Configuration Tool for the new instance, before creating a new database with the required name
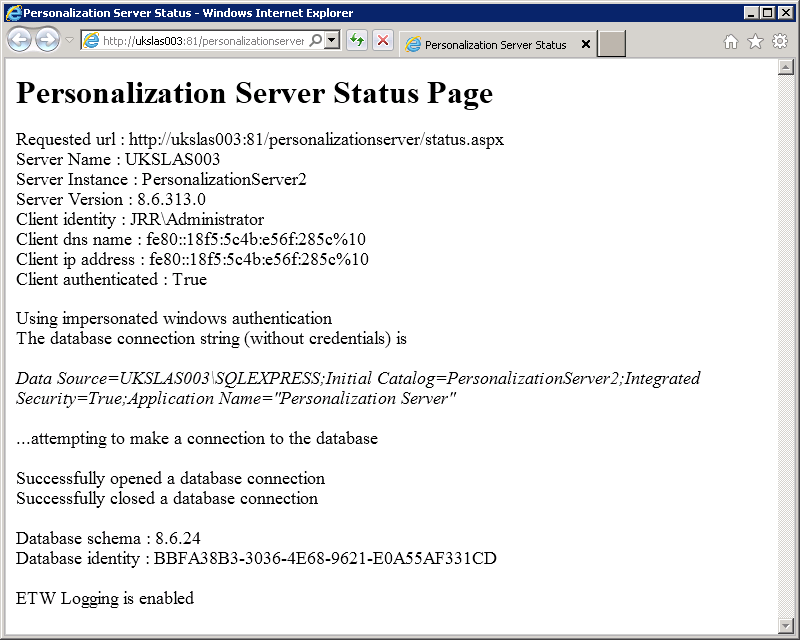
I can now test the connection by browsing to http://servername:81/PersonalizationServer/status.aspx and see if it is all working
And finally, I can configure the AppSense ADMX files to point to the required new Personalization Server instance when the Student environment is selected…
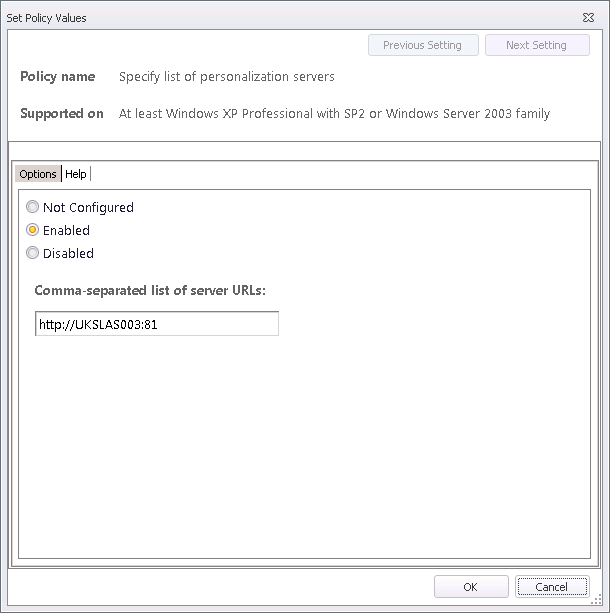

…which will then allow me to disable all but a small part of the Personalization for users in the Student environment, and leave it fully enabled for users in the Staff environment. We got there in the end!
Summary
Everywhere you go you will get unusual requirements…some of which you may possibly never see again. However, it’s an enjoyable learning experience as you try to meet these requirements, and it certainly lets you find out the power and/or limitations of the software you’re working with.
I’d really like to see the full scope of EM Conditions extended into the Personalization Server membership rules, however. This would make requirements like this a lot easier in future. But in the end we got it working in a way satisfactory to the customer – which is the main thing!

